
 |
| Homemade and flavoured butters |
Even if the butter has gained a bad name in recent years, the fact is that moderate consumption may offer us some benefits thanks to many of the substances that compose it and that protect our body.
Often people often confuse the natural and healthy butter with margarine sold in shops and supermarkets, which are full of polyunsaturated refined oils, calories, preservatives and other compounds that are not good for health. But if we learn to differentiate a real butter from margarine that we can enjoy food and enjoy its benefits.
Once you learn how to prepare this delicious homemade butter, you will not want to come back to buy margarine sold in supermarkets. With only two ingredients, you can prepare for a smooth and delicious butter that may accompany other foods and recipes. Butter makes everything taste better – but use in moderation!
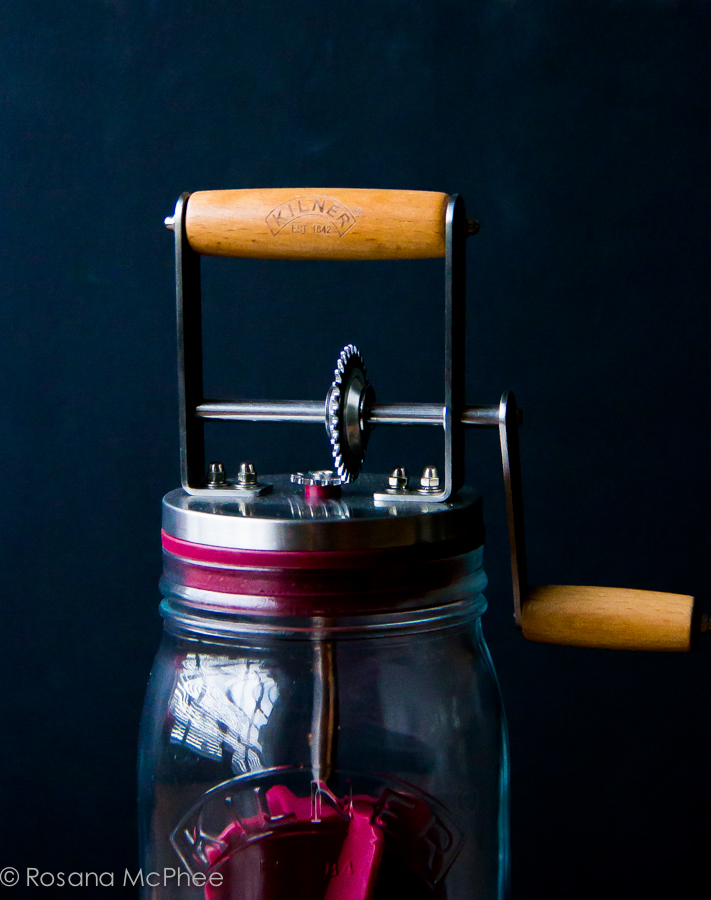
I was given a Kilner Butter Churner by Silver Mushroom, here is the delightful result of my homemade butter-making. Easy to use and comes with simple instructions. It’s impossibly delicious and so rewarding. It only takes just 2 ingredients and some elbow grease.
Homemade butter
300ml cream makes about 130g of butter
Ingredients:
300ml of organic double cream, at room temperature
Salt to taste
Method:
1) In the clean glass jar pour the cream.
2)Then start stirring for 10 minutes or a bit longer. By beating you will notice a white cream liquid that evolves as the texture becomes firmer and pale yellow. This white fluid is whey.
3)Continue beating very carefully until the cream drop as much whey as possible. Drain the whey.
4)After disposing of the whey, add a pinch of salt and beat for a further minute.
5)When
the texture is still firmer, wash the homemade butter in ice-cold water
to facilitate the elimination of the remaining whey, repeat the process
twice. Use a fine sieve to facilitate this process. Homemade and
healthy butter is ready when all the whey is eliminated.
6) Finally,
place the butter in a container and keep in the refrigerator. Well
maintained your homemade butter can last up to a month in the fridge.

 |
| after 8 minutes churning |
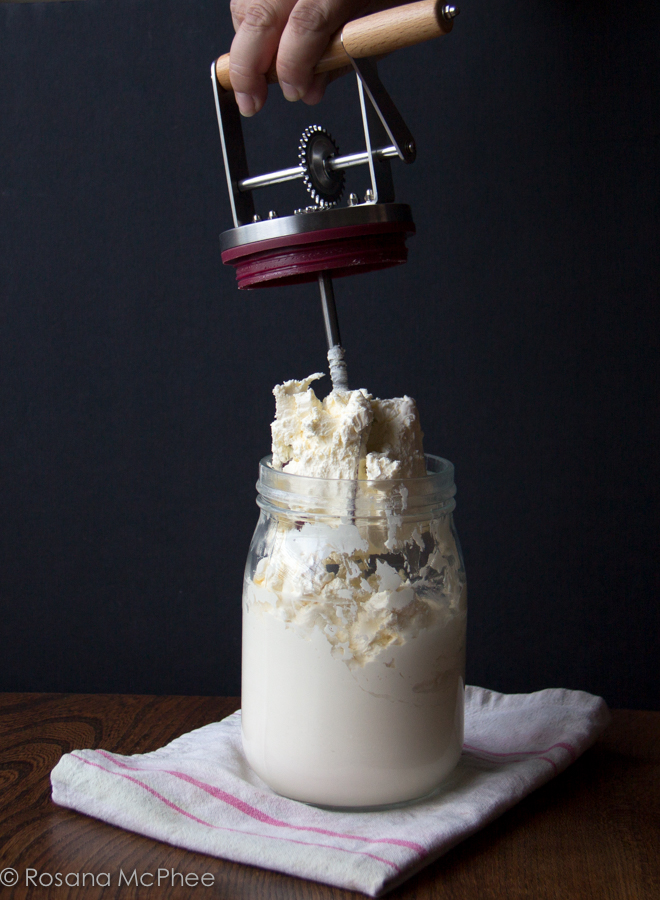 |
| after 12 minutes churning |
Tips:
1)I tried to churn more than the stated 300ml – don’t! Stick to this recipe.
I tried 600ml, and the result was not as good as 300ml.
2)Place a tea towel under the glass jar to avoid scratching the surface
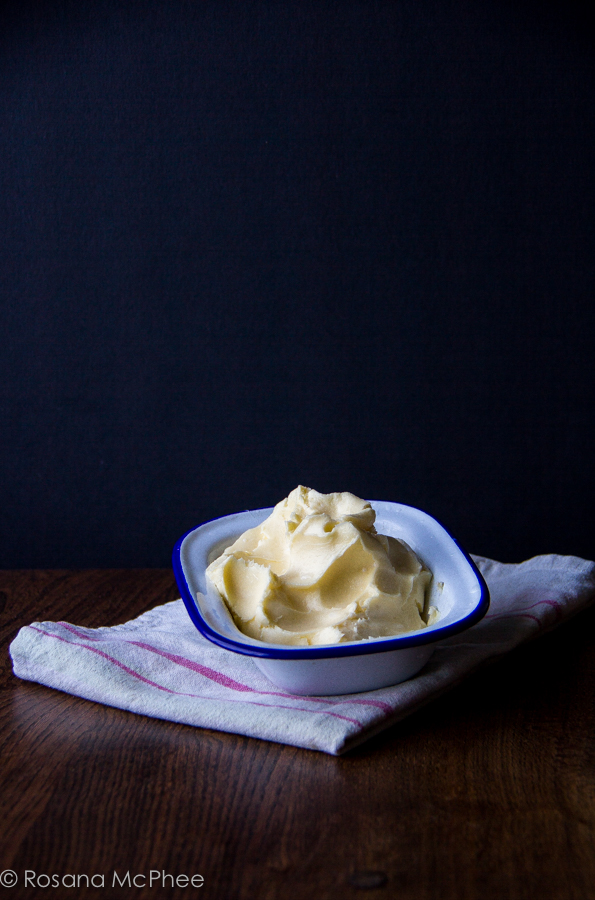 |
| Homemade butter |
Flavouring butter
If you want you can flavour the butter but adding fresh herbs such as thyme, basil, chive, among others, finely chopped.
Here are some suggestion for flavouring, after the buter is ready just beat the ingredients gently:
Breakfast or afternoon tea
Orange butter – add 2 teaspoons of orange water and orange peel
Vanilla – add 1/2 vanilla pod seeds
Damson or any other fruit – add 1 teaspoon of preferred jam
Accompaniment to food
Pink pepper – add 1 teaspoon of crushed pink pepper – great with steak
Truffle – add 1/2 teaspoon of truffle salt or truffle oil – mix well – great with fish and vegetables
Mustard and honey – 1 teaspoon fo mustard seeds and 2 teaspoons of honey – good with potatoes and pork chops
Fleur de Sel – inspired by French butter with sea salt crystals – add 1 teaspoon of fleur de sel – do not overbeat it, as you want the crystals to stay intact – I can’t tell you how good this butter is!
All measures for the flavouring are just a guideline, feel free to add more or less according to taste.
I hope you enjoy making butter at home as much I do.
Until next time why not join me on Instagram, Twitter and Facebook…X
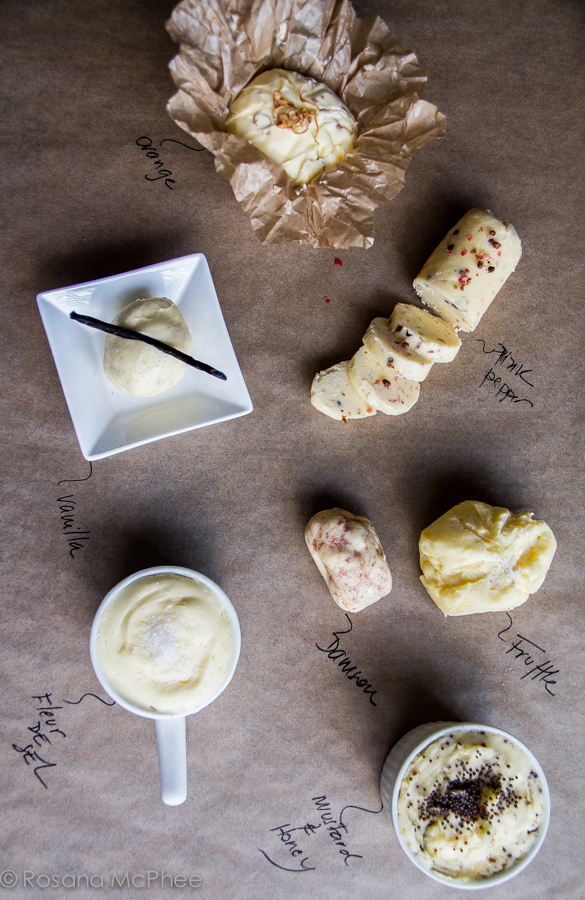 |
Flavouring butter |

This is such a great recipe. I am not a big fan of any kind of butter, but I might just like to make it myself.
I used to make butter with my grandmother – churning it, patting it, putting it in moulds. These flavoured butters are just lovely, and you explain the technique and rationale for using them so well. Lovely post. 🙂
Hi Kelie, that's great to hear I think homemade is so much tastier. Glad you like the instructions. R
What a fabulous post! I'm favouriting this for future reference! I feel butter has a bad name, but I agree – everything in moderation! x
Never thought about making home-made butter. This would make a lovely present for someone who's really into baking (yes, I have someone in mind – a friend who bakes the most delicious looking and tasting cakes).Well, xmas isn't too far away! 😉 Tx
Tracey @Face Up Beauty – it makes a excellent present for a foodie.
Wow, this looks great. I've never thought about making my own butter before. Thanks for sharing.
I too remember 'Nana' making butter. I'm giving this a try at the weekend, great step by step, tasting herb butter on a thick cut steak already.